

Thin hair breaks easily. A topper that slips or pulls can make thinning worse instead of better. The fix is simple: attach it right, and it stays put all day.
You attach a hair topper to thin hair by prepping the scalp, teasing a soft base at each anchor point, and clipping the topper to stronger hair around the thinning zone. Thin hair needs gentle clips, even spacing, and light tension. Done right, a topper feels secure and looks natural.
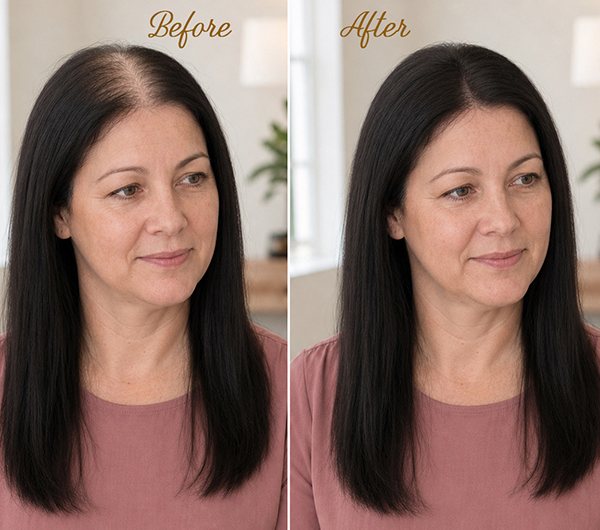
I still remember my first attempt. I clipped my topper onto freshly washed hair, and it slid back before I finished my coffee. Three months of trial and error taught me that technique matters more than the topper itself. Below is everything I wish someone had told me about attaching and securing a topper on thin hair.
How do you attach a hair topper to thin hair step by step?
Most beginners clip their topper onto smooth, freshly washed hair. The topper slides back within an hour. A few simple prep steps fix this completely.
To attach a hair topper to thin hair, first tease and lightly spray your natural hair at each anchor point. Then place the front edge about one inch behind your hairline, attach the front clips, press, and work back to the rear clip. Beginners should start with dry hair.
The five-step attachment routine for beginners
I attached my topper wrong for months because nobody explained anchor points. Thin hair on top usually comes from female pattern hair loss[1], and that condition mostly spares the sides and back of your head. So you clip the topper to that stronger perimeter hair and let the base float over the thin zone. I also stopped washing my hair on attachment mornings, because second-day hair grips a clip far better than freshly washed hair ever will.
| Step | What to do | Common beginner mistake |
|---|---|---|
| 1. Prep | Start with dry, second-day hair | Attaching freshly washed, slippery hair |
| 2. Map | Find your thinning zone in two mirrors | Covering more scalp than you need |
| 3. Tease | Lightly tease each anchor point on the sides and back | Teasing the thin hair on top |
| 4. Place | Set the front edge about one inch behind your hairline | Placing the base over your hairline |
| 5. Clip | Press and snap the front clips first, then the back | Snapping the rear clip first and twisting the base |
What should you use to secure a hair topper without damage?
Standard metal clips can cut into fragile strands. Over time that tug turns into hairline thinning. Choosing gentler securing methods protects the hair you still have.
You can secure a hair topper with pressure-sensitive clips, polyurethane or tape tabs, wig grip bands, and light hold spray. For damage-free wear, choose silicone-lined clips, rotate their placement, and never attach them to hair that is already breaking. Tension and friction cause damage, not the topper itself.
Choosing gentle securing methods for fragile strands
Damage comes from tension and friction, not from the topper itself. The medical name for clip-related thinning is traction alopecia[2], and dermatologists see it often in people who wear tight attachments every day. The protective habits are simple. I rotate my clip positions every week, so no strand carries the load twice in a row. I also switched to silicone-lined clips, because the soft lining holds fine hair without crushing the cuticle the way bare metal does.
| Securing method | Best for | Damage risk |
|---|---|---|
| Silicone-lined pressure clips | Daily clip-in wear, beginners | Low |
| Velvet wig grip band | Sensitive scalps, zero-clip days | Very low |
| PU tape tabs | Very fine, slippery hair | Low to medium |
| Sewn-in clip set on the perimeter | Large bases, all-day wear | Medium |
| Bonding glue or strong tape | Weeks of continuous wear | High on thin hair |
How do you secure a large base hair topper for all-day wear and a natural look?
A large base topper covers more scalp, so it also weighs more. One loose corner ruins the whole blend by lunchtime. Even weight distribution keeps it flat and natural.
You secure a large base hair topper by spreading the load across every anchor point, clipping the perimeter hairline first, then the sides, then the back. For a natural look, match the base shape to your thinning zone, blend the part line, and keep edge density light.
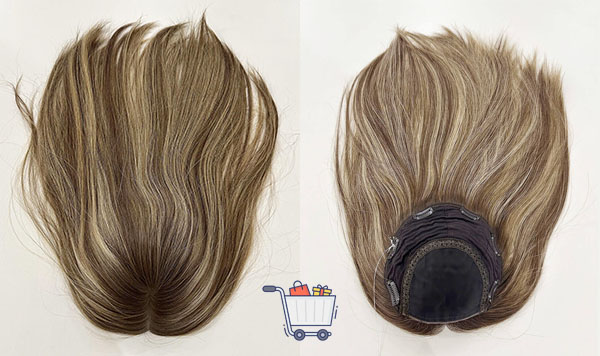
Spreading the weight across every anchor point
A large base fails when all the weight hangs on two clips. I learned this with my first 10-inch topper, which lifted at the sides by noon. The fix is distribution. I clip the front edge first, then both side zones above my ears, then the back, and every clip shares the load evenly. Many large bases also come with a breathable monofilament[3] top, and that softer cap construction sits flatter against the scalp, so the whole piece moves like natural hair.
| Base size | Typical clip count | All-day wear tip |
|---|---|---|
| Small, 4–6 inch | 3–4 clips | Check the rear clip at noon |
| Medium, 7–9 inch | 5–6 clips | Add a grip band on humid days |
| Large, 10 inch and up | 6–8 clips plus pressure tabs | Anchor above both ears before the back |
How do you stop a hair topper from slipping?
A slipping topper is a confidence killer. You check it in every mirror and still feel it shift. Slipping almost always comes down to placement and prep, not the topper.
You stop a hair topper from slipping by placing clips where your natural hair is strongest: two rows behind the hairline, one above each ear, and two at the crown. Tease each anchor point, spray lightly, and snap every clip fully closed. Slippery straight hair needs extra texture.
Where each clip belongs and why
Placement beats clip count every time. With female pattern baldness[4], the hair above your ears and along your back hairline stays dense the longest, and those zones are your grip. I place two clip rows behind my hairline, one clip above each ear, and two clips in the strong back zone. I never clip into the thin crown itself. Teasing each anchor point with a fine-tooth comb adds the texture that slippery straight hair is missing.
| Clip position | Hair quality in that zone | What happens if you skip it |
|---|---|---|
| Two rows behind the hairline | Dense and strong | The front edge lifts in wind |
| Above each ear | Usually unaffected by thinning | A visible gap forms at the sides |
| Back hairline zone | Strong occipital hair | The base lifts when you look down |
| The thin crown | Fine and fragile | Clip here as little as possible |
How tight should a hair topper feel, and how do you keep it secure in wind?
Wearers often clamp every clip as tight as possible. That pressure builds headaches and sore spots by afternoon. Wind then exposes the weak points anyway.
A hair topper should feel snug but painless, like a loose headband, and you should forget it within an hour. For wind, use a wig grip band, clip down both side zones, and tie a low loose braid or bun with a silk scrunchie to cut drag.
Tuning the tension and beating the wind
A topper should feel like a soft headband, and you should forget you are wearing it within the first hour. Constant pulling from tight hairstyles[5] can trigger the same follicle stress that clip damage causes, so loosen anything that aches. For wind, I use a velvet wig grip band under the perimeter, and I braid my leave-out hair into a low loose braid. The braid cuts drag, and the band anchors the base, so even a gusty day cannot lift the front edge.
| Signal | What it means | Quick fix |
|---|---|---|
| Headache within an hour | Clips are pulled too tight | Release and re-clip with less tension |
| Red pressure marks at night | The base sits on bare scalp | Shift the base onto stronger hair |
| You forget you wear it | The tension is correct | Keep the exact same setup |
| The front lifts in a breeze | Weak side anchors | Add a grip band and a low braid |
Conclusion
Attaching a topper on thin hair comes down to four habits: prep your anchor points, clip to strong perimeter hair, distribute the weight, and keep the tension gentle. Do these consistently, and your topper will stay flat, comfortable, and natural from morning to night.
References
MedlinePlus Genetics — Androgenetic alopecia: causes and inheritance of female pattern hair loss. ↑ Back
Wikipedia — Traction alopecia: hair loss caused by prolonged pulling on the hair. ↑ Back
Wikipedia — Wig: cap constructions including monofilament tops. ↑ Back
Cleveland Clinic — Female pattern baldness: why the sides and back keep density longer. ↑ Back
Mayo Clinic — Hair loss causes, including tight hairstyles and constant tension. ↑ Back