

Thinning temples can make a hairstyle look unbalanced, but a full extension set often adds more hair, weight, and work than this small area needs.
Hairline extensions add targeted fullness around thinning temples. I place small, lightweight pieces slightly behind the visible hairline, clip them into healthy supporting hair, and cover the attachments with natural hair for a balanced finish.

I like this hairline extension because it solves a local problem without turning it into a full-head installation. The result depends on choosing the right wearer, using the right pieces, and respecting the condition of the natural hair.
Are Hairline Extensions Right for Thinning Temples?
Not every sparse temple can safely hold a clip. Choosing the product before checking the supporting hair can create poor coverage, discomfort, or unnecessary tension.
Hairline extensions are suitable when the temples look less full but still have enough healthy hair behind them to hold and conceal lightweight clips. They are not designed to attach directly to bare, irritated, broken, or severely weakened areas.
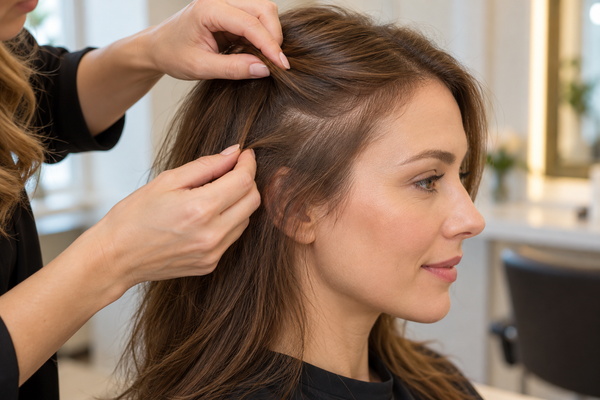
I start by identifying the real coverage area
I first separate a cosmetic volume concern from a condition that needs professional attention. Hairline extensions can make the temple area look fuller, but they do not diagnose or treat the reason for thinning. The NHS notes that hair loss1 can be gradual or temporary and may have several causes. I recommend medical advice when thinning is sudden, patchy, painful, inflamed, or unexplained. I also ask whether the change is stable and whether the wearer has recently noticed warning signs2 such as unusual shedding, itching, redness, scalp sensitivity, or increasing breakage.
For cosmetic use, I look for a narrow area of reduced fullness near the temples or sides, plus a stronger section of natural hair slightly farther back. That stronger section carries the clip. The hair left above it conceals the attachment. If I cannot find both a secure anchor area and enough cover hair, I do not force the placement. A topper, wig, headband, or a different styling method may be more appropriate.
| What I see | My recommendation | Reason |
|---|---|---|
| Mild thinning with healthy hair behind it | Consider lightweight hairline extensions | The clips have supporting hair and can stay behind the visible edge |
| Fine hair with limited cover | Test one small piece first | A small piece makes visibility and comfort easier to assess |
| Bare patch, active irritation, or broken hair | Do not clip into the affected area | The area may not safely support or conceal an attachment |
| Crown or part-line thinning | Consider a hair topper | A topper is designed to provide coverage over the top of the head |
| Sudden or unexplained thinning | Speak with a doctor or dermatologist | A cosmetic hairpiece cannot identify the cause |
Where Should You Place Hairline Extensions?
Pieces placed directly on the front edge can show or pull. Pieces placed too far back may add volume without improving the temple area.
Place hairline extensions slightly behind the visible hairline, never on the fragile front edge. I use smaller pieces near the temples and longer pieces above the ears or along the sides, then leave enough natural hair above each attachment to hide it.
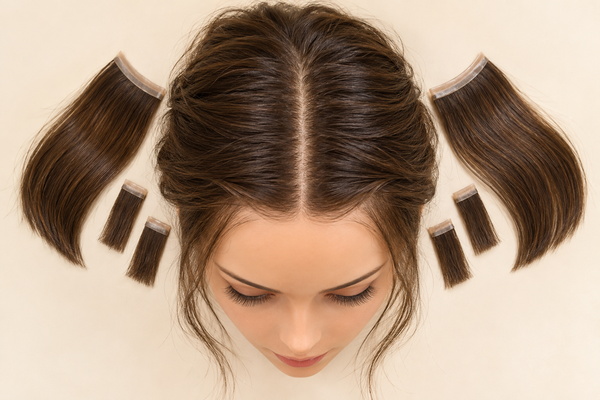
I use the six pieces as a flexible toolkit
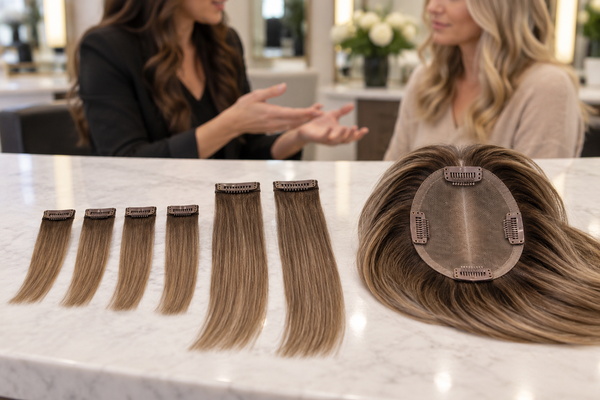
The Findingdream Hairline Extensions set contains four 1-inch pieces and two 4-inch pieces. I do not assume that every wearer needs all six pieces. I start with the least amount of added hair that creates a visible improvement. I normally test a 1-inch piece behind each temple first. If the sides still look light, I position a 4-inch piece above each ear, following the curve of the head. The remaining small pieces can balance uneven areas, but I only use them when there is enough supporting and covering hair. This gradual method helps me judge the effect of each piece instead of creating unnecessary bulk and then trying to hide it.
I keep each clip away from the very front edge, the soft baby hairs, and any visibly stressed area. I also avoid stacking pieces in one spot. A little space between attachments spreads the volume and helps the natural hair move more freely. Placement should feel secure, but it should never feel tight, painful, or heavy.
| Piece | Suggested starting area | What I check before clipping |
|---|---|---|
| 1-inch piece | Slightly behind the left temple | Healthy anchor hair and enough hair above to conceal the edge |
| 1-inch piece | Slightly behind the right temple | Equal height and a comfortable grip |
| 4-inch piece | Above the left ear or along the side | The piece follows the head without pulling |
| 4-inch piece | Above the right ear or along the side | The two sides look balanced from the front |
| Extra 1-inch pieces | Small uneven areas along the sides | Each area can support another clip without crowding |
How Do You Apply Hairline Extensions Step by Step?
Rushing the installation often leads to uneven placement, visible edges, or too many pieces. A simple sequence makes the result easier to control.
To apply hairline extensions, begin with dry, detangled hair. Create a clean section behind the temple, test the clip against healthy hair, attach the smallest useful piece, release the cover hair, and check the result from the front and side before adding more.
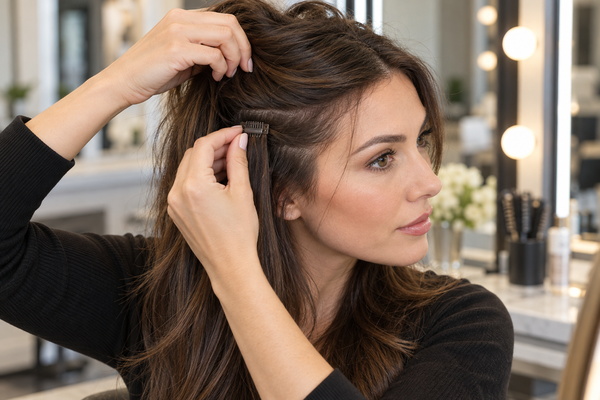
My six-step application method
- I prepare the hair. I make sure the natural hair is dry and gently detangled. I avoid placing clips over heavy oils because the attachment may slide.
- I create a shallow section. I lift a thin layer of cover hair near the temple and clip it out of the way.
- I check the anchor area. I look for healthy hair behind the visible hairline. I do not attach the piece to baby hairs or an exposed sparse patch.
- I start small. I open one 1-inch piece, place it flat against the curve of the head, and close the clip without pulling the section tight.
- I release and blend. I lower the natural hair over the attachment and use my fingers or a wide-tooth comb to combine the two layers gently.
- I assess before adding more. I check the hairline in a front mirror, side mirror, and natural light. I only add another piece when it solves a visible gap.
I repeat the process on the other side, but I do not chase perfect symmetry. Natural hairlines are rarely identical. I focus on balanced fullness and comfortable placement. Once both sides look even, I move my head, smile, and lightly touch the area to confirm that no clip pinches or shifts. I also turn my head from side to side and lift the surrounding hair as it might move outdoors. This movement test often reveals an edge that a still mirror view misses. If the clip feels secure only when I pull the natural hair tightly over it, I choose a different position. A good installation should stay discreet through normal movement without depending on tension, heavy spray, or constant adjustment.
I remove the pieces just as carefully
I support the hair near the root, open each clip fully, and lift the piece away without dragging it through the natural hair. I remove the extensions before sleeping, showering, or swimming. I then detangle and store the pieces flat. Gentle removal matters because even a lightweight product can catch and pull when someone removes it too quickly. I remove the pieces one at a time, starting with the easiest attachment to reach. I never comb across a closed clip or pull the extension downward to release it. After removal, I check the anchor area for tenderness, redness, or extra broken hairs. If I notice any of these changes, I pause wear and reassess the placement before using the pieces again.
How Do You Blend Hairline Extensions Naturally?
Correct placement can still look obvious when the color, density, or styling does not match. Natural blending depends on restraint more than maximum volume.
To blend hairline extensions naturally, match the mid-lengths and ends of your hair, use only the pieces you need, keep every edge beneath a light cover layer, and style the natural hair and extensions together with gentle, consistent texture.
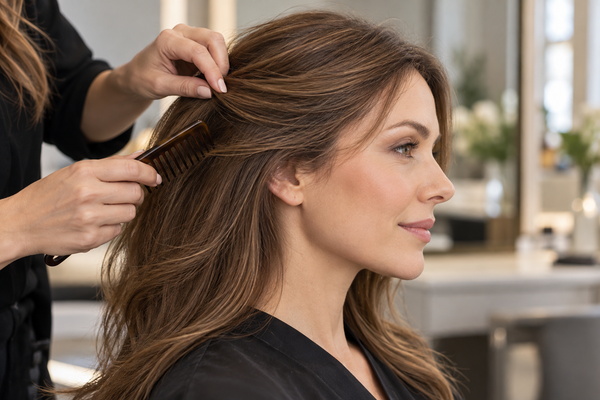
I match color where the extensions will actually sit
I compare the extension shade with the hair around the temples and sides, not only with the roots or a single indoor photo. Root color can be darker, and the ends can be lighter or warmer. I check the match in indirect daylight and compare several strands against the area that will cover the weft. Dimensional colors, balayage shades, gray blends, and salt-and-pepper mixes need the same careful comparison because their tone distribution matters as much as the main color. I avoid judging a match under yellow bathroom lighting or from a heavily filtered image. When the natural hair sits between two shades, I usually prefer the option that reflects the visible mid-lengths rather than forcing an exact root match.
I also keep the added density believable. Fine hair usually looks more natural with fewer pieces and a gradual increase in fullness. If I can see a ledge, a sudden block of density, or the outer edge of a piece, I first adjust the position instead of adding more hair. A soft bend or loose wave can help the natural hair and extensions move as one layer. I use low heat only when the product instructions permit it, and I keep hot tools away from clips and attachment edges.
I check the result in real conditions
I do not rely on one bathroom mirror. I look at both profiles, move the hair with my fingers, and check the result near a window. I also test the hairstyle I plan to wear. A low ponytail, side part, or tucked-behind-the-ear style can expose a clip that stayed hidden when the hair was down. If an attachment becomes visible, I move it farther back, change the part, or use fewer pieces. I take one photo from each side because a camera can reveal a line or color shift that my eyes overlook in the mirror. I also avoid placing a piece where glasses, sunglasses, or an ear loop will rub against it. These small checks make everyday wear more comfortable and keep the result convincing from more than one angle.
| Blending problem | Likely cause | My adjustment |
|---|---|---|
| The edge shows near the temple | The piece is too close to the front | Move it slightly back and leave more cover hair |
| The side looks bulky | Too many pieces or too much density | Remove one piece and redistribute the remaining hair |
| The extension looks separate | Color or texture does not match | Recheck the shade and style both layers together |
| A clip appears when hair moves | The cover section is too thin | Lower the piece or choose a more covered position |
| One side looks heavier | Placement or piece count is uneven | Reassess from the front before adding more hair |
When Should You Avoid Hairline Extensions or Choose a Topper?
Trying to make clips work on fragile hair can turn a cosmetic solution into another source of stress. The safest choice starts with the condition and location of the thinning.
Avoid hairline extensions when the attachment area is painful, inflamed, broken, bare, or unable to conceal and support a clip. I choose a topper for crown or part-line coverage, and I seek medical advice for sudden, worsening, or unexplained hair loss.
I treat discomfort as a stop signal
The American Academy of Dermatology explains that repeated pulling can contribute to traction alopecia, and it specifically identifies hair extensions among styles that can create stress when they are too tight. I therefore treat pain, tenderness, headache, or a pulling sensation as a reason to remove and reposition the piece rather than “waiting to get used to it.” Comfort should remain consistent after several minutes of normal movement. If a position keeps pinching after I move the clip, I leave that area free instead of trying a tighter grip.
I also watch for itching, redness, scaling, bumps, broken hairs, or increasing thinning. The British Association of Dermatologists notes that long-term repeated tension can damage follicles and lead to permanent hair loss. These sources discuss traction generally, so I do not claim that any clip-in product is risk-free. I reduce avoidable stress by choosing lightweight pieces, using healthy anchor hair, wearing fewer pieces, removing them gently, and giving the hair regular rest days.
I choose the product by location, not by product popularity
A hairline extension adds hair around the temples and sides. A topper sits over the top of the head and can provide coverage across the crown or part line. Traditional clip-ins add more volume or length through the sides and back, but a full set may be more than someone needs for a small temple area. I choose the option that matches the location of the concern. I also consider whether the wearer wants visible scalp coverage, added side density, longer ends, or a complete style change. These goals sound similar, but they require different products. I avoid recommending extra pieces simply because more hair appears more valuable. The smallest solution that addresses the correct area usually looks more natural and is easier to wear.
| Main concern | Hairline extensions | Hair topper | Traditional clip-ins |
|---|---|---|---|
| Mild thinning at the temples or sides | Often the most targeted option | May provide more coverage than needed | A full set may add unnecessary weight and density |
| Visible scalp at the crown or part | Not designed for this area | Usually the more suitable category | Does not directly cover the top of the head |
| Fuller lengths and ends | Adds limited, local fullness | Not its main purpose | Usually the most suitable category |
| Very fragile or insufficient anchor hair | Do not attach to the weak area | Suitability depends on the base and remaining hair | Avoid loading fragile areas |
| Complete coverage | Not suitable | Partial coverage only | Not suitable |
I see hairline extensions as a targeted cosmetic tool, not a universal answer to hair loss. When the attachment area is healthy and the concern is mild, they can create a subtle improvement with less hair than a conventional set. When the scalp needs coverage, the natural hair cannot support clips, or the thinning is progressing, I recommend choosing another solution and getting qualified advice.
Conclusion
I use hairline extensions behind healthy temple hair, start with the smallest useful pieces, blend them under natural coverage, and remove them at any sign of discomfort. Careful placement creates better results than adding more hair.